

iSlide > Design Layout > Circular Crop

The interface of "Circular Crop"
-
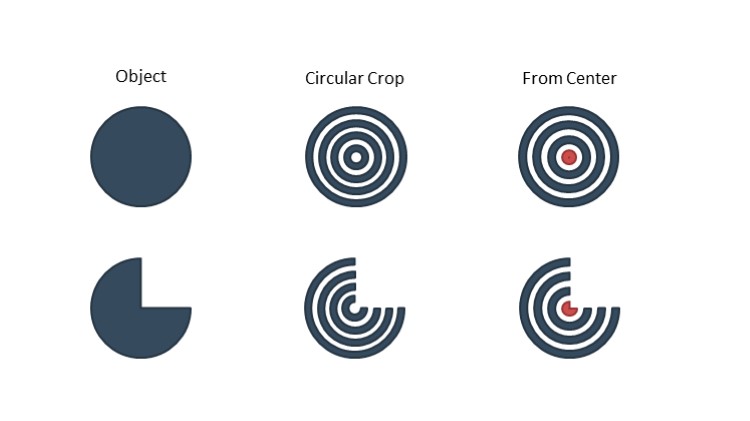
The “Circular Crop” is available for ovals, partial circles and arcs in PowerPoint “Shapes”

-
Count: Set the amount of rings after cropping
-
Space: The spacing between the rings after cropping (The percentage of the object's "loop width" after applying "Circular Crop" to it)
-
From Center: Set whether the cropping starts from the center of the circle
-
Apply

It defaults to “Circular Crop”. When checking “From Center”, it will generate a solid object based on the center of the circle (except “arc”).
How to use "Circular Crop"
-
Circular count (3); spacing (100); not start from the center
-
Apply

Circular Spacing
For example: apply “Circular Crop” to an “oval” and set the Circular Count as 2 and Space as 50.
After cropping, the space is 50% of the circle width.

Example
To precisely adjust the shape, you are recommended to use “Circular Crop” and “Adjustments Editor” together.

How to do
-
Click Insert > Shape to insert an “oval”, “pie” or “arc”
-
Click iSlide > Design Layout > Circular Crop and set the parameters
-
Click iSlide > Design Layout > Adjustments Editor and adjust the size of the circle by adjusting the “handle”
-
Adjust the thickness and color of the line, add text and more.

The effect might vary due to different objects and layout.
